A Selection of (Mostly) Historic Costume Projects |
| Once upon a time, almost two decades ago, I decided to build a web site to share some of my historic costuming projects. In the beginning, it was a small site with minimal pictures (had to actually get film developed and scan the prints in order to get pictures online back then!) and over the years it has grown as my costume wardrobe has grown (and as technology has improved!) A few months ago, I took it down all together, so that I could give it a thorough makeover, and really bring it up to the current day's technology, thanks to all the programming classes I've taken over the past few years. It's taking a bit longer than expected to build that out, so in the meantime, here is a very image-heavy page with a selection of my historic costume projects. I invite you to travel back in time with me, starting with the 16th century and moving forward through the 20th century, by simply scrolling down this page. Thank you so much for your visit! |
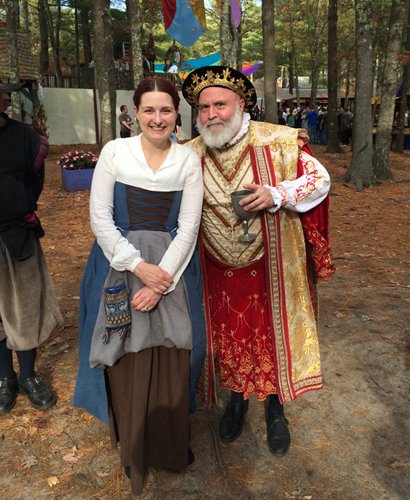
1560s-1570s Ensemble |
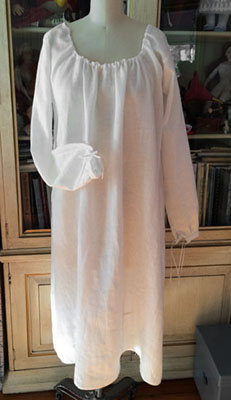
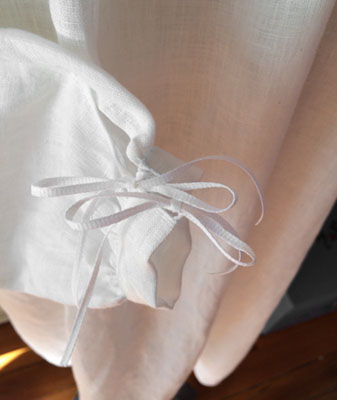
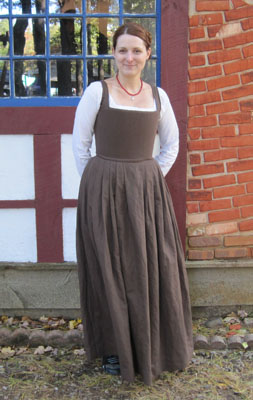
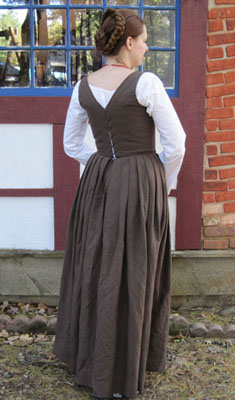
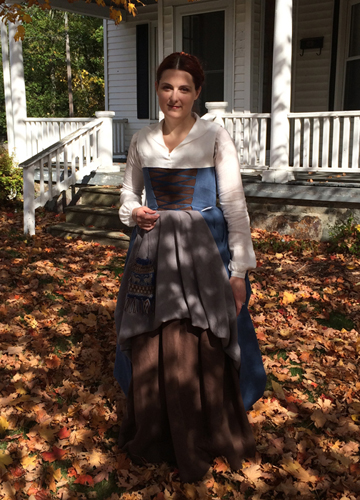
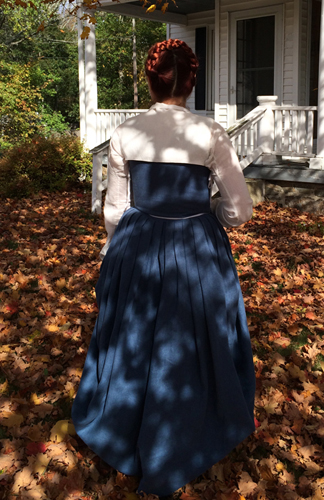
| My inspiration for this ensemble with an array of (mostly Flemish) paintings of the 1560s-70s, such as Joachim Beuckelaer's The Four Elements - Fire. This ensemble begins with a linen smock which was handsewn, and features a simple drawstring neck and cuffed sleeves which tie. Next is a kirtle of brown linen which is fully boned across the bodice front with reed, to help obtain a period shape. Over that goes the dress, which is of blue and gray linen. |
|
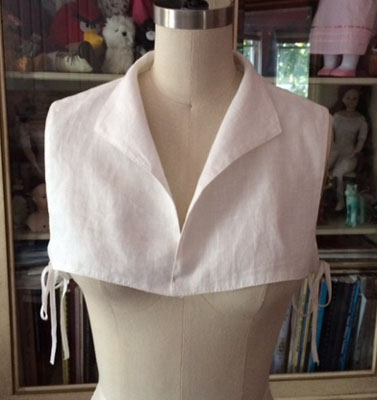
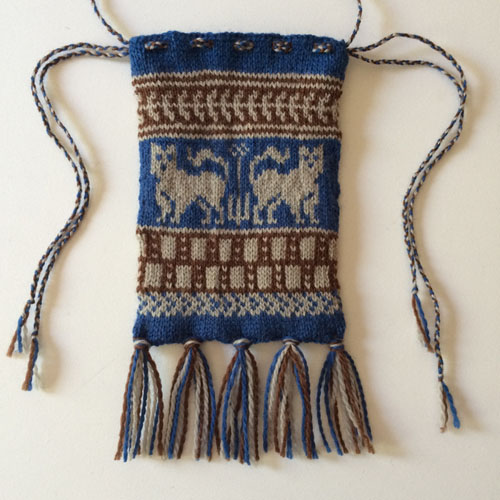
To accessorize, I sewed a simple partlet of white linen, and knit a small square pouch using an excellent chart by Wendi Dunlap. The style of this pouch is perhaps a little behind the times for the date of the rest of my ensemble, but I could not resist the cat motif, and the destination I was wearing this ensemble to was King Richard's Faire so perfect historical accuracy was not necessarily a concern in this case!
|

|
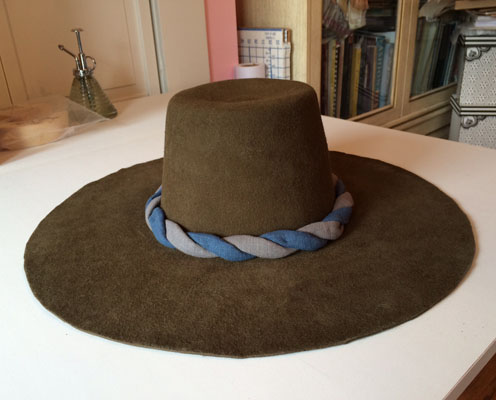
17th Century Hat |
| I decided that I wanted to make an early 17th century ensemble, and instead of the usual method of working my way out from underpinnings, ending with accessorizing, I went straight to the hat! This hat was made from a wool felt capeline. I shaped this hat using my steamer and a hat block that my husband carved for me out of a fallen tree from our backyard. My trimming is just strips of linen leftover from my 16th century ensemble, and the notion of twisting them like this was inspired by something similar I saw on a trip to Plimoth Plantation. |
|
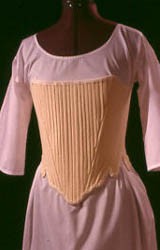
Assorted 18th Century Underthings |
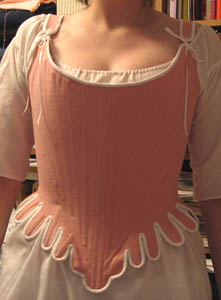
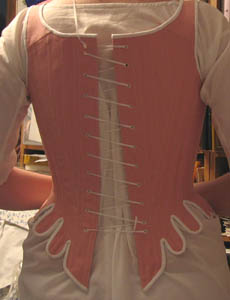
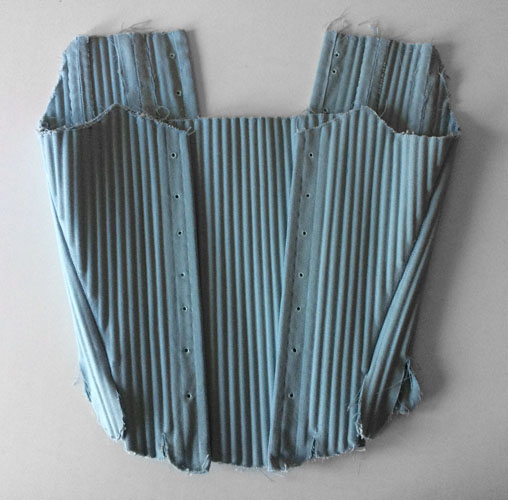
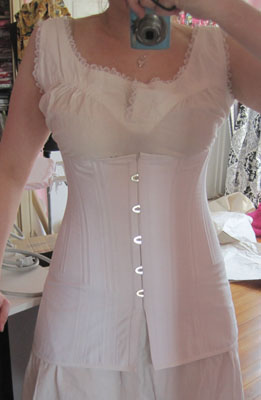
| Over the years, I've made quite a few 18th century underthings. I confess that I have a bit of an addiction to making shifts and stays! At last count, I have three 18th century shifts and four 18th century stays (not including those I've sent on to new homes). This is a little absurd seeing as how I attend 18th century events approximately once every five years or so! Also, pads and petticoats? I actually can't even count how many I've made! I went nuts making every shape and size of pad you can think of, trying to find what would create the exact shapes I was looking for. Sadly, I have not been fantastic about taking and posting pictures of most of these pads (and while I haven't got rid of any, I have had to unstuff most of them due to storage space issues). So, what follows is a random assortment of pictures of underthings. Stay tuned for more because I have two more shifts and three more stays in my "things to sew soon" pile! (The addiction is real!) |
|
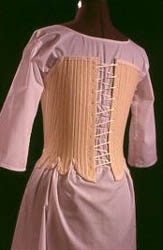
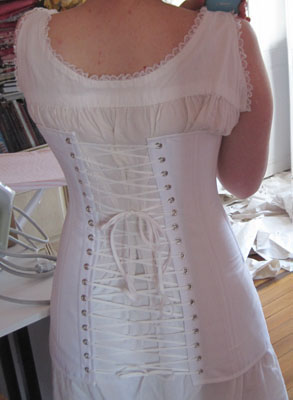
The first pair of images shows a cream colored pair of stays which are fully boned with reed, and displayed over a simple shift with a high neck. The second pair of images showed partially boned stays in pink canvas based on the Diderot stays from Norah Waugh's "Corsets and Crinolines," shown over a shift with a neckline that is gathered with a drawstring. The last pair of stays shown at the end are my current work in progress. They are fully boned in reed, and lace not only in the back, but also in the front, over a matching stomacher. They just need lining and binding and can then be called finished!
|
|
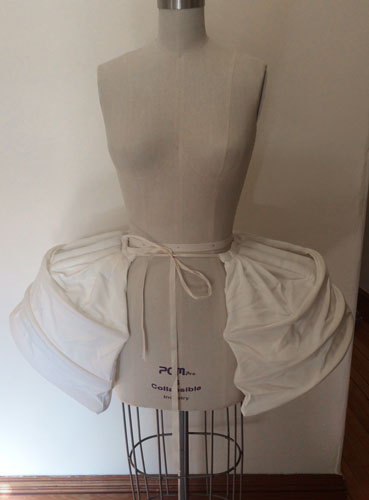
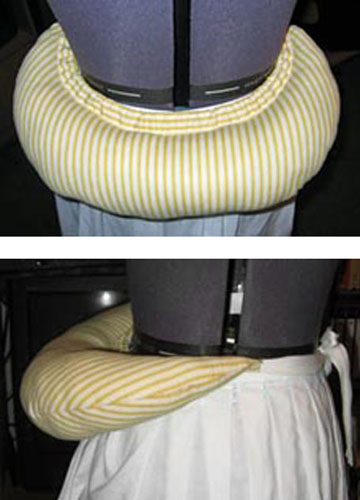
The skirt supports shown are a pair of side hoops with cane and padding, and then one of my many bustle pads, this one being a crescent shape and moderately stuffed with cotton padding. I have made quite a few crescent pads, as well as assorted channeled pads, but this is the one that I found I like the most under my favorite 18th century dresses.
|
|
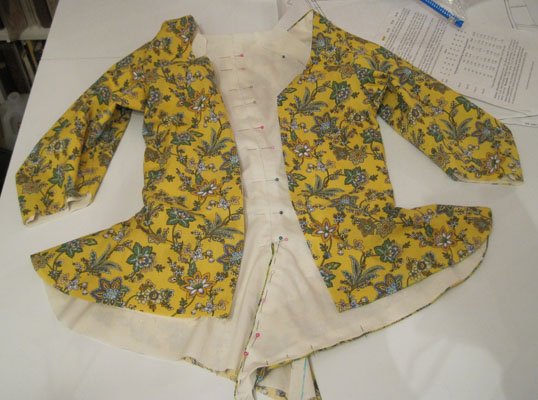
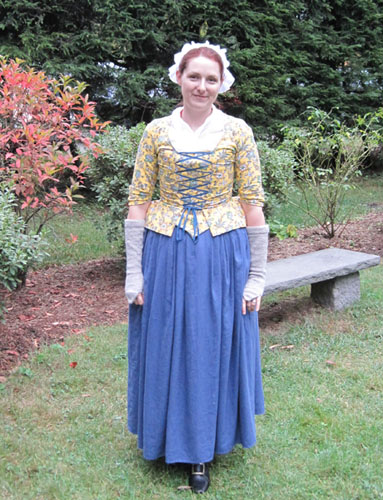
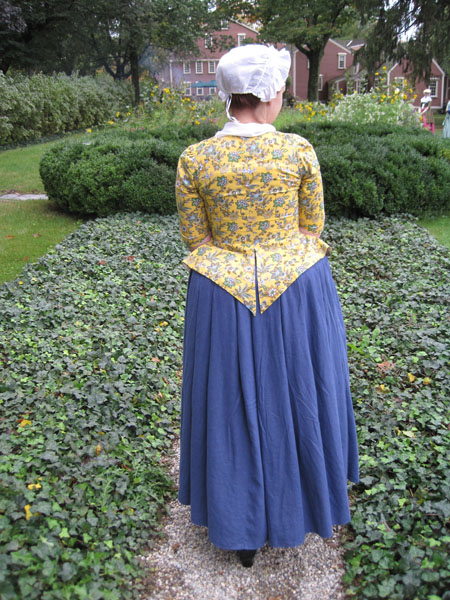
Yellow Chintz Jacket-in-a-Day |
| This jacket is one of my favorite makes because I challenged myself to hand-sew a jacket in one day. . . And was able to do it, except hand-sewing the eyelets, which was done at a later point in time. It is shown in the pictures worn with a blue linen petticoat, and several accessories, including a cap that I hand-sewed of organdy, a pair of my handknit 18th century mitts, and a fichu that is a simple square of voile that I finished with a narrow hem on all sides.
|
|
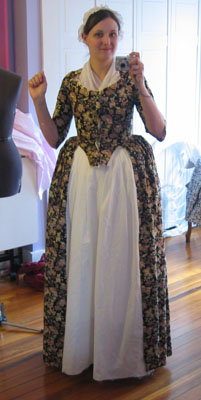
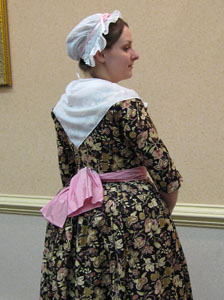
Two Dresses of the Same Pattern |
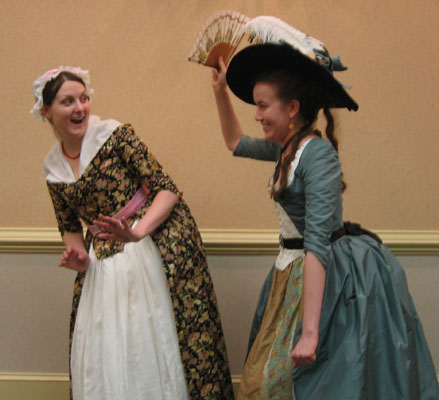
| The following two dresses may look very different. . . But they are the exact same pattern, just in very different fabrics! The pattern is developed from one of the dresses in Patterns of Fashion 1. The first one was a good lesson for myself in relaxing a bit when sewing. It's so easy to get caught up in wanting to make everything perfect, and become afraid to even cut into a nice fabric! But this fabric I knew was not period-correct, so I wasn't really worried about "ruining" it, and letting the worry go resulted in one of the most enjoyable makes I've yet had - and I got a perfect fit, too! Now I try to always keep this dress and the worry-free success I had with it in mind when I approacah any projects. The results are always better when you are relaxed and happy as you make a thing! The dress is shown below first in progress, and then worn with one of my organdy caps, a pink silk taffeta sash, a simple fichu, and a necklace that I hand-knotted using red coral beads. (Oh and one "just for fun" picture of the sort of silly adventures this dress has been on with a good costuming friend!) |
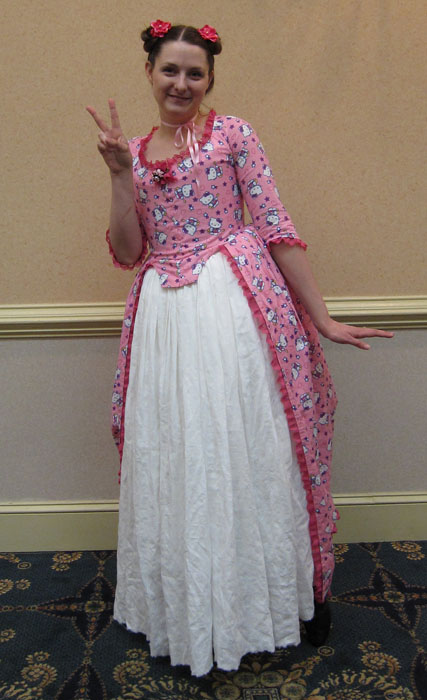
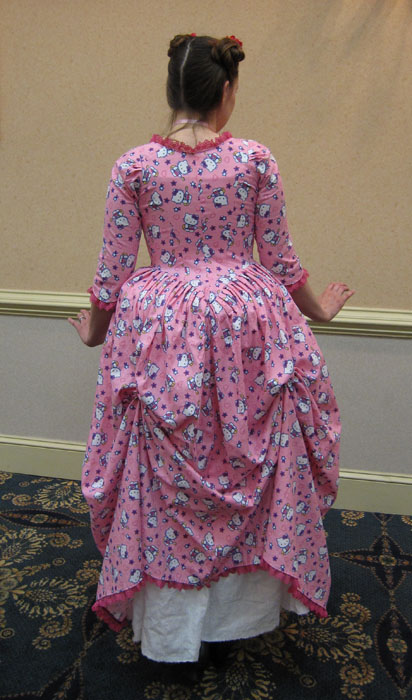
| The next dress was a total lark, in which I combined my love of 18th century fashion with my love of Hello Kitty and created a "twisted historical" look that I wore to Costume Con. For this dress, I sewed linen tapes on the inside of the dress, allowing the skirt to be worn in polonaise fashion. It was a lot of fun to let go of my need to be historically accurate, and just go ahead and use that bright pink polyester lace! |

|
|
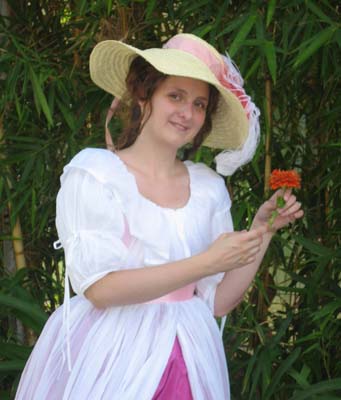
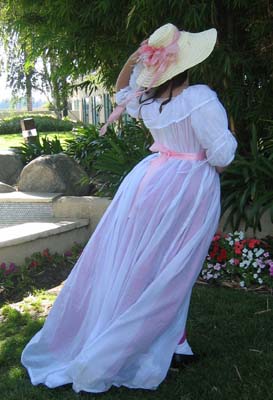
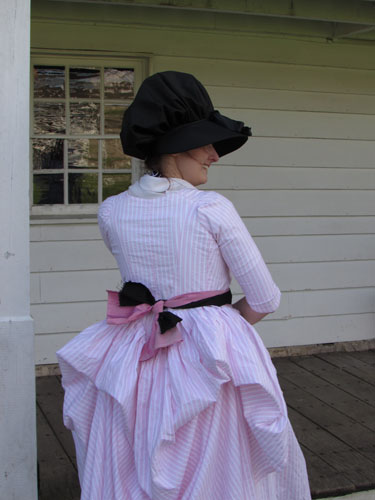
Pink & White Ensemble |
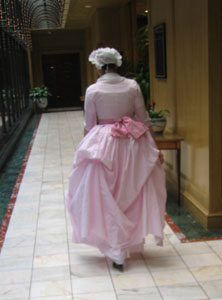
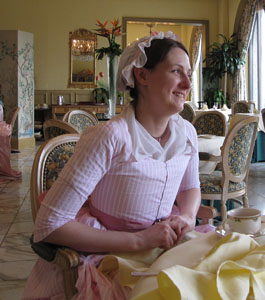
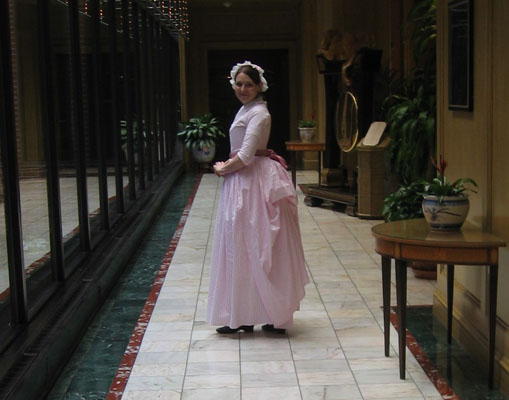
| This dress is made of a lightweight pink and white striped cotton which has cotton tapes for wearing the skirt polonaised, and has a matching petticoat of the same fabric. The sash is pink shot silk taffeta, the cap is organdy trimmed with pink silk ribbon, and the fichu is a simple square of voile with a narrow hem. While quite a simple ensemble, this has turned out to be one of my most-worn 18th century outfits, as it is very breathable and comfortable (and pink!) |
|
|
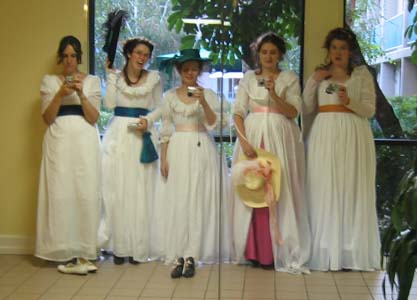
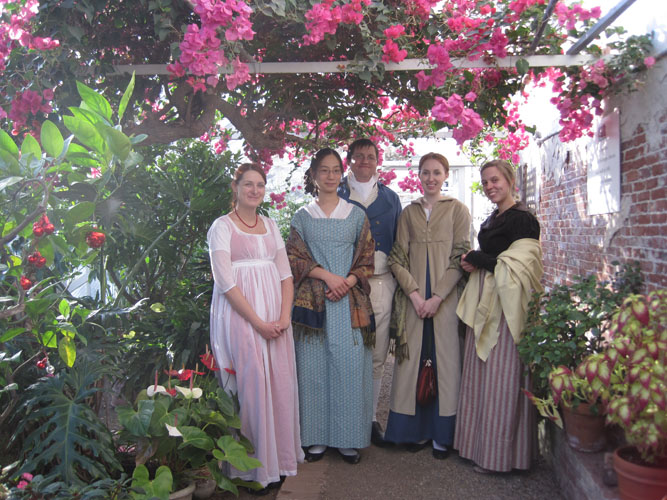
Chemise à la Reine |
| This chemise dress I made from white cotton voile, and wore to Costume College as part of a group of ladies who all planned to wear chemise dresses together. Typically, I make all of my historic costume items myself, but for this ensemble, I got by with a little help from my friends! The hat was a gift from a good costuming friend, and the petticoat is on loan from another friend. The sash is just a very wide bit of ribbon tied around the waist. For this dress, I used the pattern provided in The Cut of Women's Clothes by Norah Waugh. |
|
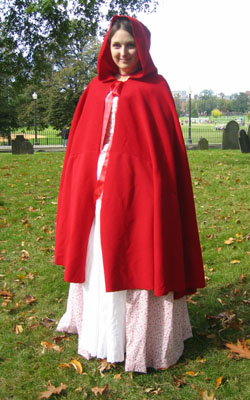
Cardinal Cloak |
| It's no secret that a red cloak was a fashionable thing for a girl to have in the 18th century, but I'll confess that my need for one was mostly driven by my love of the Pleasant Company doll "Felicity" and her cardinal red cloak, which I always wished to have as a child! I sewed my cloak by hand using the most delicious red wool, silk thread, and a silk ribbon tie. The pattern is the cloak pattern provided in Linda Baumgarten's "Costume Close Up." |
|
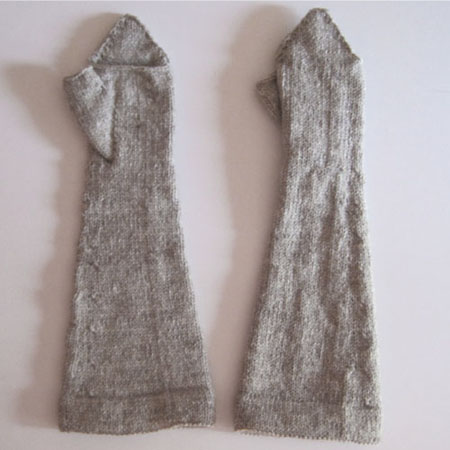
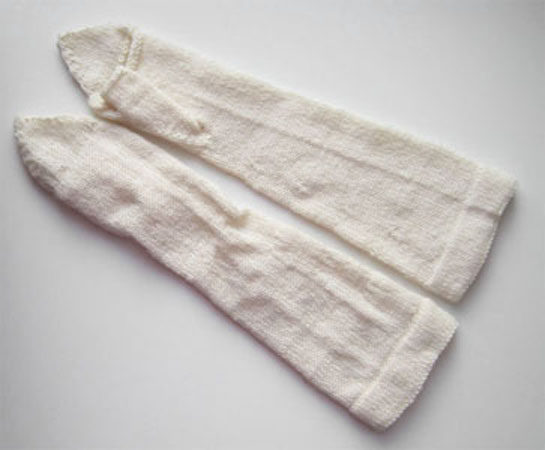
Lots of Handknit Mitts! |
| A few years back, my good friend Gloria published a knitting pattern for 18th century mitts based on a pair at the Museum of Fine Arts Boston (although at a chunkier gauge than the originals). After knitting my first pair, I was positively hooked! They are a very portable project, so are perfect for keeping tucked in my handbag. I've made myself two pairs so far (with plans for another pair, this time from a lovely wool/silk blend I have squirrelled away), and also made a couple for friends! |

|
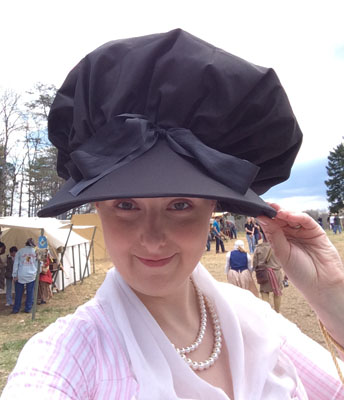
A Very Big Bonnet |
| I think every 18th century lady needs one of these puffy silk bonnets! Mine is exceptionally large and over-the-top, because it's just more fun that way! It is hand-sewn of black silk taffeta, with very stiff organdy supporting the "puff," and a brim of buckram covered with flannel and wired to keep its shape. This hat is a lot of fun to wear! |
|
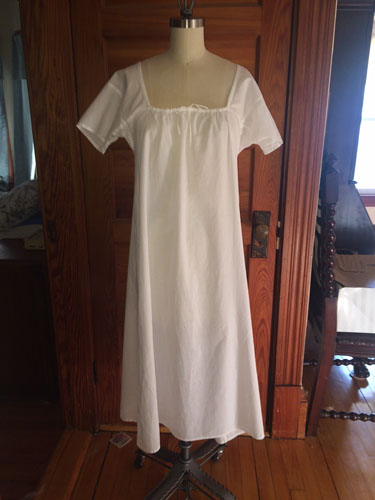
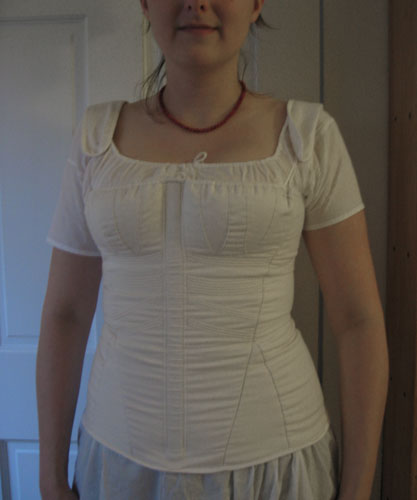
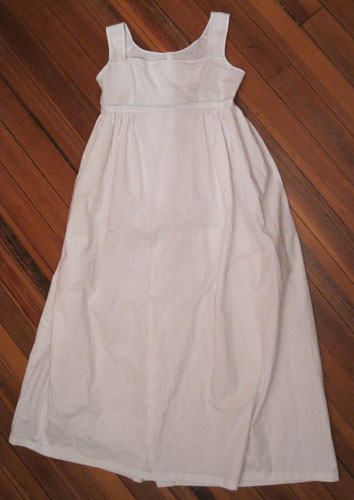
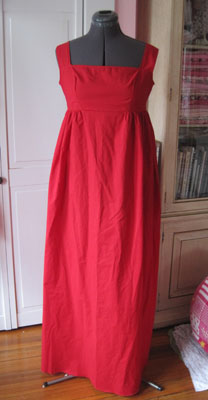
Early 19th Century Underthings |
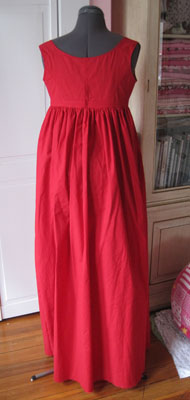
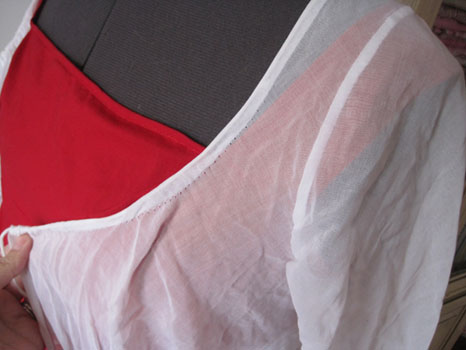
| The early 19th century is another era for which I have enjoyed making quite a few underthings! I still have a few new things to photograph (a pair of short stays, and a couple more bodiced petticoats), but shown below are a few things that I do already have photographs of. First off is a shift that I very recently finished, featuring a squared neckline. The second picture shows another shift that I have made, but more importantly, my entirely hand-sewn corded stays! These were a real labor of love, and I'm quite happy with them, though I do plan to go back and cut the shoulder straps to a bit more narrow, so they suit my narrow shoulders a bit better, and also add some decorative embroidery between the cording, just as soon as I can make up my mind on an embroidery design to use! The final pictures are two of my bodiced petticoats. The first is just a plain white cotton, but the second one is a bright red, as putting a colorful petticoat under a sheer dress is a very lovely (and period-correct) thing to do! |
|
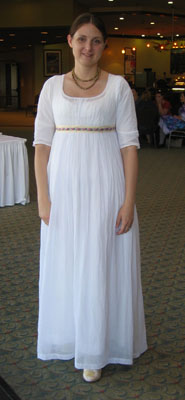
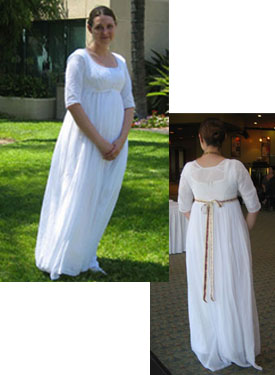
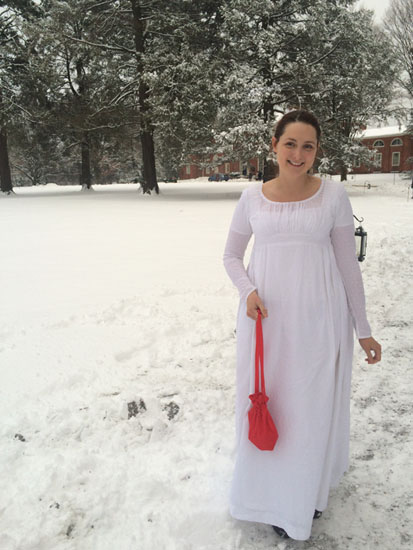
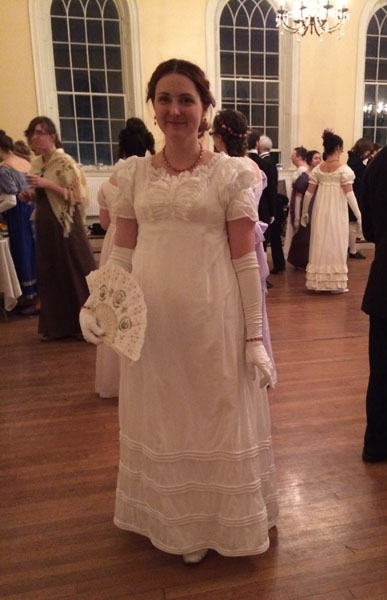
Little White Dress |
| Every early 19th century girl needs a classic "little white dress" in her wardrobe! To keep mine interesting, I got adventurous with my closure, instead of the standard back-opening dress that many ladies like to make. I absolutely fell in love with a dress that Emma Thompson wears as Elinor in the 1995 version of Sense and Sensibility (a close-up is shown in the second-to-last picture below), and after pausing the DVD and studying various scenes where she wears it, I figured out how it was done. How it works is that the bodice opens at the center front, but the skirt opens at the side front. The waistband then overlaps, with the wearer's right side of the bodice being sewn to the bodice, but not the wearer's left side of the bodice. I hope this makes sense! The next time I have this dress out, I will take pictures that more clearly demonstrate this method of closure! |

|
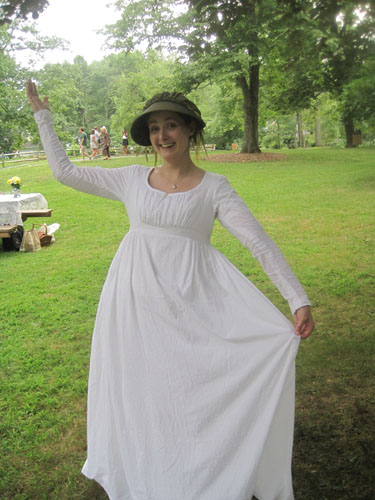
Dotted Swiss Dress |
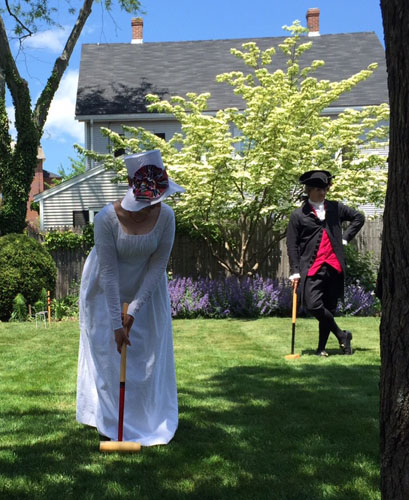
| This dress is, without a doubt, my most-worn historic costume item. It has seen so many picnics, teas, holiday events, and even an afternoon of croquet, that it is really earning its keep! It is hand-sewn of white dotted swiss cotton of a pattern that I drafted myself. (Please excuse the very large seam allowances in the second picture. . . I wore it to an event before finishing all the inner seams, but as you'll see in the first picture, I did finally rectify that situation!) Although these pictures are all shown wearing the dress over a white bodiced petticoat, this one is also fun to wear over brightly colored petticoats, as it is just sheer enough to let a bit of the color show through. |
|
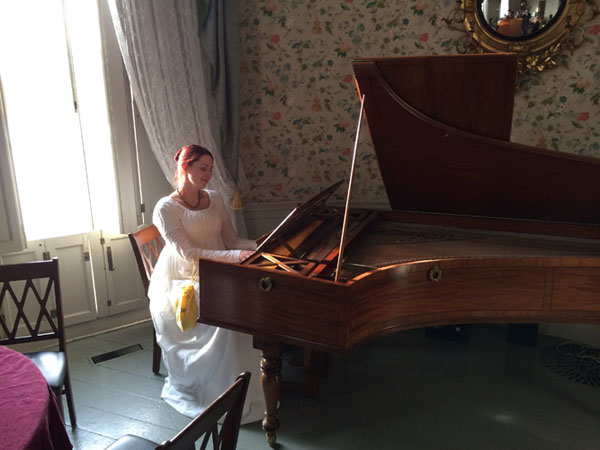
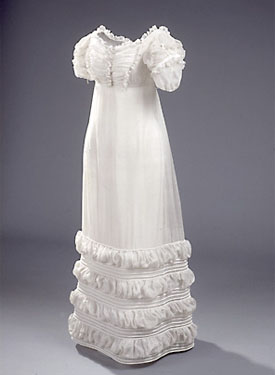
The Wicked Puffy Dress |
| This dress is one of my favorite things that I have made! I hand-sewed this using the 1822 "brudekjole" (wedding dress) that the National Museum of Denmark very generously made available as a scaled-down pattern on their web site. The pattern was all in Danish, so I got to learn a handful of Danish sewing terms so that I could understand the construction notes provided! I wore this dress to a Jane Austen themed ball, and in order to make it on time, I was not able to add the puffs at the hem of the dress. I have since cut the strips that will become those puffs, and hopefully will be adding those soon! The final picture below shows the original dress from which the pattern was taken. |

|
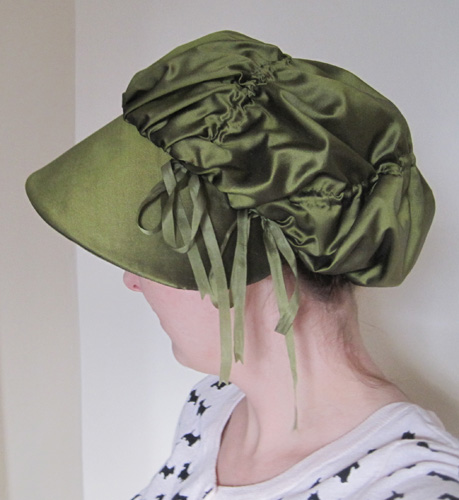
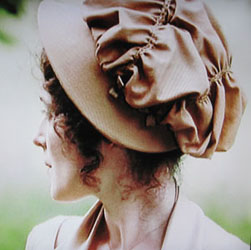
Green Bonnet |
| One of my all-time favorite films is the 1995 miniseries of Pride and Prejudice. There are a few historical costume items I'd love to make from this film, but the one that really struck my fancy was a bonnet with a puffy, gathered crown that Lizzy wears. I decided to make a similar bonnet, but mine is in some green silk that I had in my stash. The pattern is of my own invention, with a similar gathered crown, but I went with a slightly different brim shape, because I felt that it looked a bit better with my face. The crown is silk lined in cotton, with silk ribbons for gathering, and the brim is wired buckram that is mulled in flannel, covered with the green silk. I absolutely loved the way it turned out, and think I will have to make another bonnet from this pattern in the future! |
|
Sheer Bonnet |
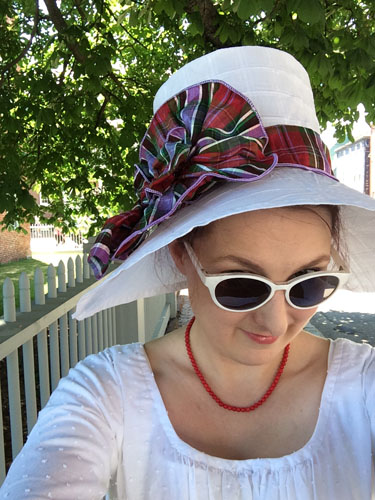
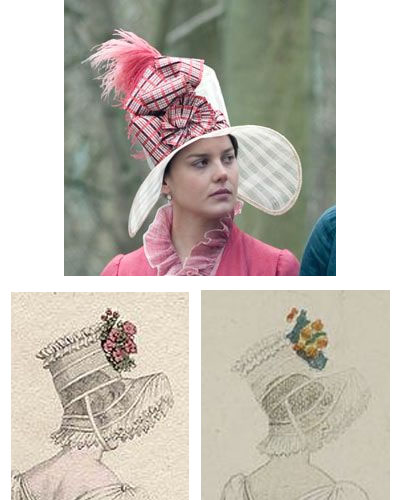
| I absolutely fell in love with a particularly fabulous sheer bonnet worn by Abbie Cornish in the film "Bright Star." I went hunting around for any evidence that such a bonnet existed, and I did find two fashion plates from 1813 which show a sheer bonnet! (These are the exact same bonnet, but two different fashion plates from different publications, oddly!) What followed next were a lot of experiments with different weights of fabric and types of glues and stiffeners. The final bonnet is literally nothing but fabric and stiffener - no buckram, no wires, no other forms of support! This is pretty amazing to me since the fabric I used is actually a pretty decent weight. No doubt I would have been able to wear this bonnet with no problem, but the day I wore it turned out to be the hottest day of the whole summer, and as the day wore on and the humidity became ridiculous, my bonnet began to wilt (as did I, for that matter!) As a result, I will need to re-shape the brim, and this time I might slide some white millinery wire into the brim. However, I also have since found a very sheer, lightweight plaid silk, similar to the bonnet in the film, so I might end up making a whole new hat! I could not find a ribbon close to the fabulous pink ribbon used on the film bonnet, but I did find some lovely silk tartan ribbon in my stash which I think worked out great! |
|
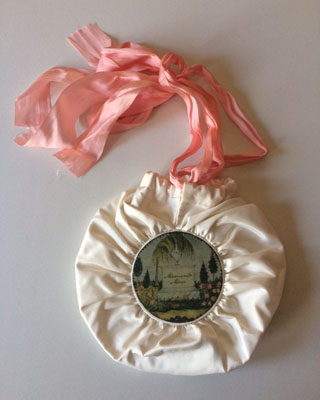
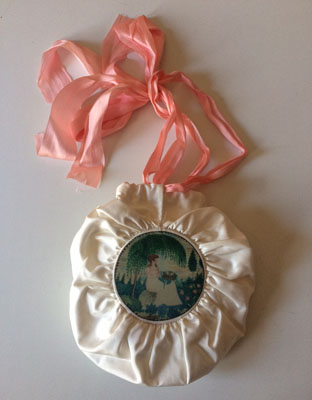
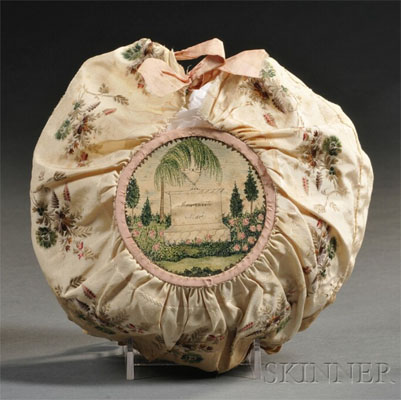
Mourning Reticule |
| This little gathered, round reticule seems to have been a very popular shape of a purse in its day, as I know of quite a few surviving examples, and have seen it featured in several fashion plates as well. For my first round reticule, I decided to copy a mourning reticule that was auctioned at Skinner auction house, as I was attending Jane Austen Fest in Kentucky, and there was a mourning theme for Jane Austen that year. My reproduction is made in cream silk taffeta, and has pink silk ribbon ties. I neglected to add the pink ribbon around the edge of my motifs, but have a silk cord that matches my ribbon ties that I will at some point add around my center motifs to finish the look! The final picture below is of the original reticule that inspired my own. |
|
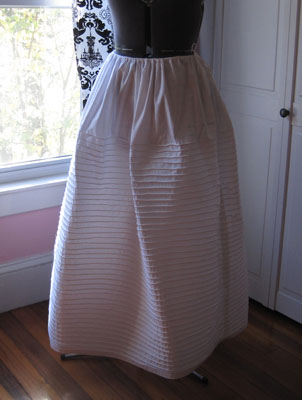
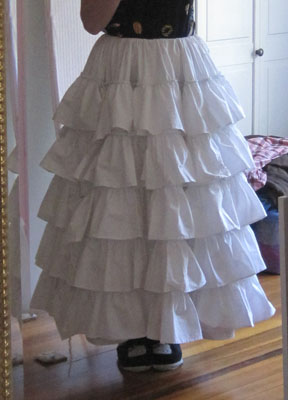
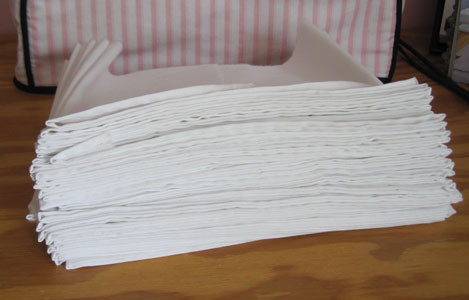
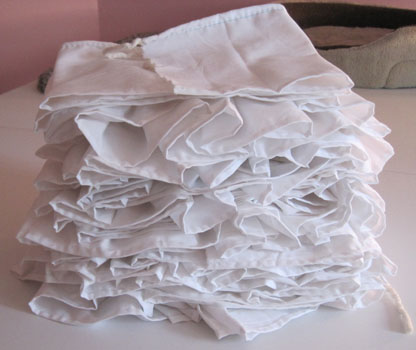
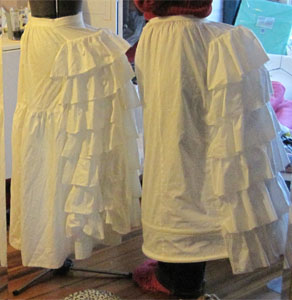
Corded & Flounced Petticoats |
| Knowing that I had some 1830s-1840s sewing adventures ahead of me, I embarked on a mission to puff out my skirts without the help of any steel. . . And it worked! For my first petticoat layer, I made a petticoat with a lot of rows of cording. I mean, a LOT of rows of cording! I used a pretty heavy-weight cord that I believe is meant for piping around the edges of pillows, and it really worked, because this thing really stands out on its own! For my next layer, I made a petticoat that has a few miles (okay, not really, but it felt like that!) of ruffles, each of which is gathered over still more cord. The last two pictures show the piles of ruffles before gathering, and after gathering over the cord. In both cases, I gave the petticoats drawstrings at the waist, mostly because I was in the process of losing weight and didn't want to have to immediately pull the waistband off and alter it! In the end, this really worked out, because the drawstring allows me to adjust where the petticoat sits on my waist/hips for different dates and styles, and also fits over different corsets/stays. These are very swishy and a lot of fun to wear! |
|
1830s Day Dress |
| This dress turned me into a wee bit of a lunatic! I had an event I wanted to attend, and I spent way too much time changing my mind about styles, fabrics, and base patterns. In the end, I ended up making most of this dress in just under two days! I don't know if it was all that sleepless sewing, or the champagne that was handed to me upon arrival at the event, but one way or another, this dress really brought out the Popeye in me! Ha ha ha! Silliness aside, I felt really accomplished getting this dress done in time (and not cutting corners, and so piping seams and such madness!) I was sad I couldn't come up with something better to do with my hair, but hair is not my strong point. I pulled these vintage millinery flowers out of my stash and hoped they'd give a hint of the tall hair that was popular at this point in time! I really need another excuse to wear this dress so that I can create a big hair structure! |
|
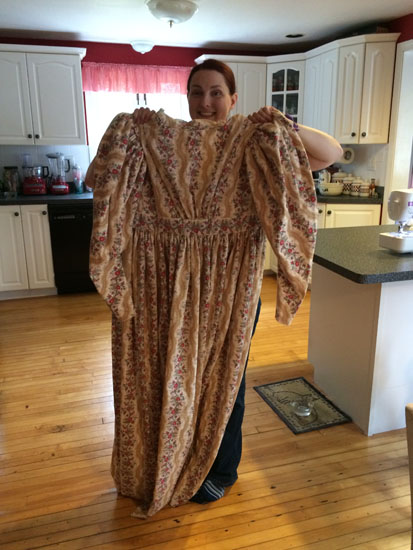
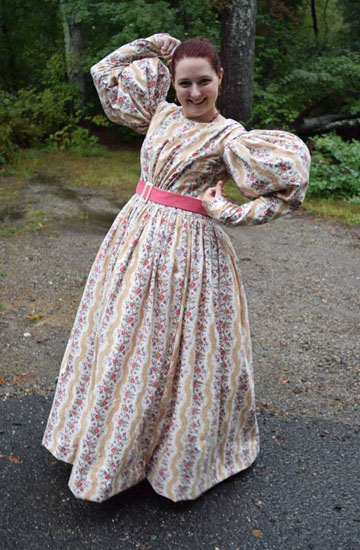
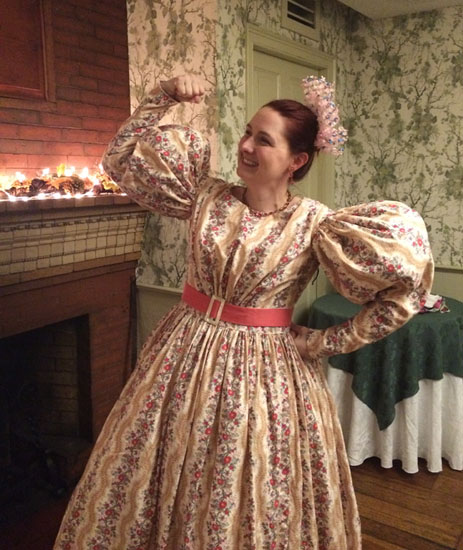
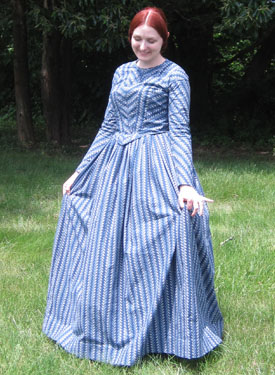
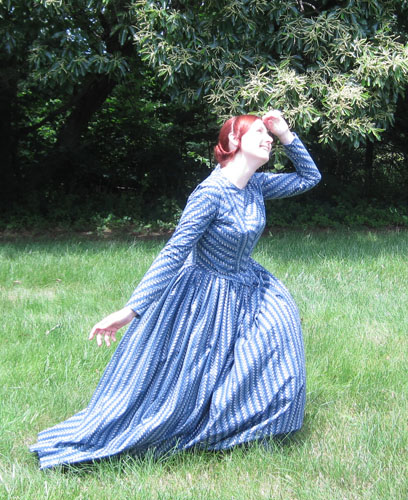
1840s Printed Cotton Dress |
| My favorite book of all time is Jane Eyre, so it was only a matter of time before I made something 1840s! This dress is made of a printed cotton, and the pattern I used as a base is from an actual paper pattern sheet printed in the 1840s that I am lucky enough to own! I had a ball deciding the placement of the fabric, turning the print in different directions to get interesting details on the pieces running down the front and on the sleeves, and didn't feel the dress needed much trimming beyond that. However, when I wear this dress the next time, I'll add a detachable collar and cuffs! And, the last picture is me channeling Jane Eyre dramatically collapsing on the moors, pining over Mr. Rochester, of course! I'm pretty sure Jane wouldn't have been laughing but what can I say? I can't keep a straight face when being silly! |
|
Assorted Things From the 1850s-1880s |
| To be honest, I haven't sewn - or worn - 1850s-1880s things in quite a long time! As a result, the pictures I have are few and of terrible quality. One of these days, I will have to pull everything out, iron/steam things, finish any trimmings and such, and take magnificent pictures! For now, the following pictures will have to do. . . |
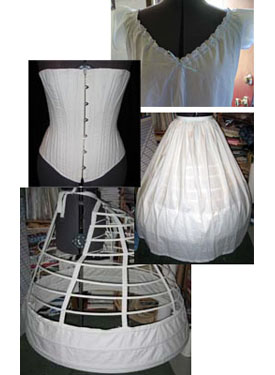
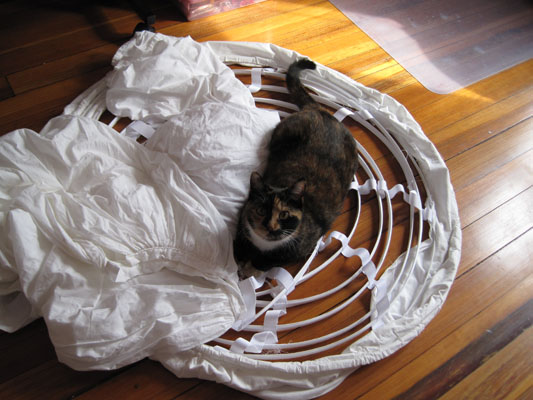
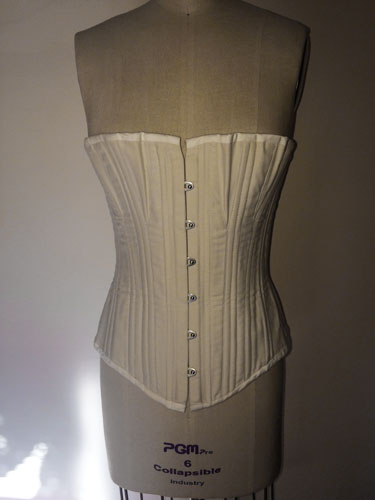
| I've made quite a few corsets, crinolines, bustles, petticoats, chemises, and drawers, for both myself and friends! Only a few are pictured below. The first picture is a collage of several things: a twill corset from the Laughing Moon pattern, a chemise from a Truly Victorian pattern, the Truly Victorian elliptical shaped crinoline, and a simple petticoat that fits over it. The next picture is mostly of my cat, Ginger! But also, that is a different crinoline, which is round as opposed to elliptical, as well as a petticoat, chemise, and drawers. This is basically what the end of every fitting looks like in my sewing room: a heap of underpinnings, and one (or more) cat(s)! Next up are two bustles, each with a ruffled overlay. They are both Truly Victorian bustles, with the one on the left being the smaller bustle they offer, and the one on the right being the "grand bustle" which definitely has more "back" as well as supports at the bottom of it, to help hold out the skirts. Finally, another Laughing Moon corset, this time in a stone grey twill with white binding. The next thing I will likely do as far as mid-late 19th century underpinnings will be to make up the Wooded Hamlet crinoline kit, which was a gift to myself many years ago and has been languishing too long, waiting to be made! |
|
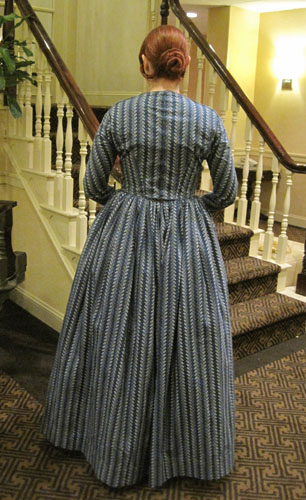
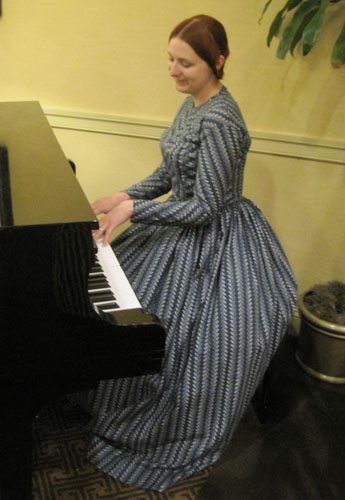
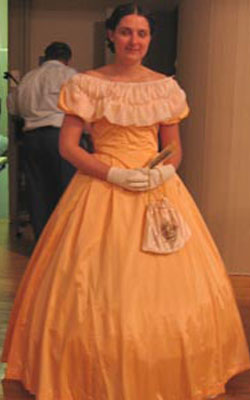
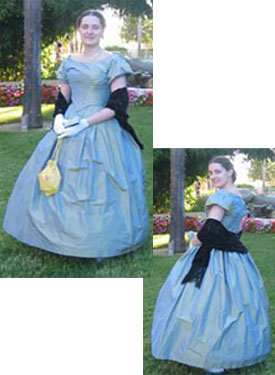
| The following ensembles are very old, but still fun to look back on and see how I've progressed! The first two are vaguely 1850s-1860s ball gowns, from when I used to attend a lot of the Commonwealth Vintage Dancers Civil War era balls. That first one is actually an acetate taffeta, because it's back when I had a strict policy of never spending more than $10/yard on fabric (HAHAHAHAHAHA), but the bertha is silk chiffon that is a later addition to the gown. The next dress is blue/gold shot silk, from after I realized I was DEFINITELY going to spend more than $10/yard on fabric now and then! This gown was meant to have black velvet ribbon trimmings but I've yet to get around to adding them, as I stopped attending the dance events and moved on to other eras for which I had events to attend! |
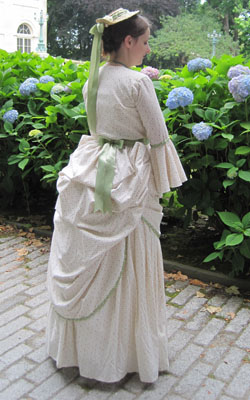
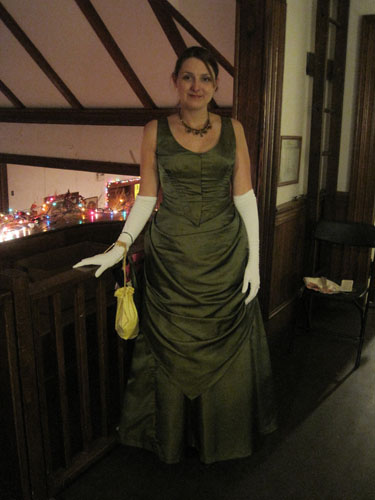
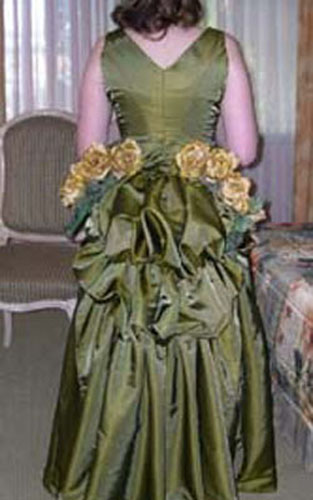
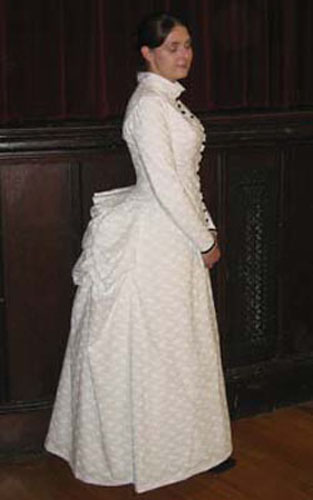
| Next up are three 1870s-1880s ensembles I've made. The first is a printed cotton ensemble meant to represent c. 1871 in style. Next up, we've jumped forward a decade, and here is a green satin ball gown. I had the BEST time draping the pattern for the bustled overskirt! That is seriously addictive fun and even just looking at these pictures makes me feel like I should probably make another bustle era something! And finally, a simple white calico 1880s day ensemble, with a collar that I absolutely hate, because it's a really weird shape (I used it as it came out of the pattern envelope), but also because I hate having clothing touching my neck! At some point, I'll probably go back and add a MUCH shorter collar to this dress! I left this dress pretty plain, adding only some black grosgrain ribbons at the sleeve and black glass buttons down the front, similar to my inspiration dress (which I need to dig up pictures of and add here when I do!) |

|
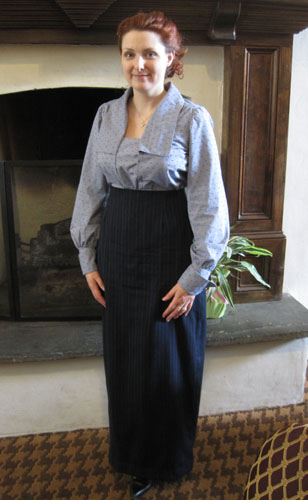
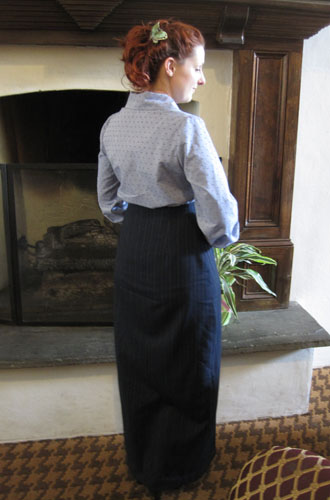
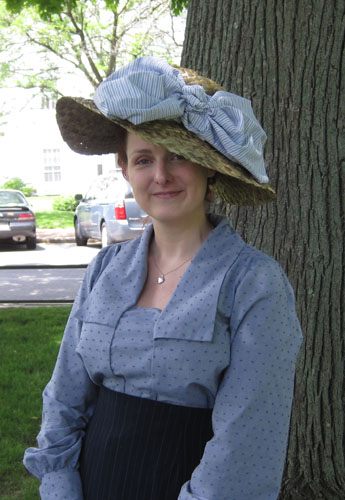
A 1910s Ensemble and Underpinnings |
| When everyone caught Titanic-anniversary-itis a few years ago, I just had to play along! To start with, I made an appropriate corset. This was my first under-bust style, and I was sure there was no way this was going to support my "tracks of land!" I was very surprised to find that, combined with the chemise, this corset actually does the trick. (In this picture, I'm wearing another layer under the chemise for modesty, so you'll just have to take my word for it!) For a blouse, I used the Folkwear Armistice blouse pattern and some blue cotton dotted swiss that I got for a song at my local fabric shop. The skirt is a striped blue gabardine, and not shown is a simple white petticoat that is very similar to the skirt. For Costume Con, I curled and puffed up my hair as best I could, and decorated with a replica of the butterfly comb from the film of Titanic, but when I wore the ensemble again for a 1910s tea and stroll to support a local library, I decided a very big hat was in order. This actually started life as a very ridiculous beach hat with bits hanging off of it. I soaked it in hot water until it became pliable and re-shaped it, chopped off all the bits and tucked under raw edges, and then decorated with a very big bow. It was a little heavy, but great fun to wear. I really wish big, fancy hats would come back into fashion for everyday wear! |
|
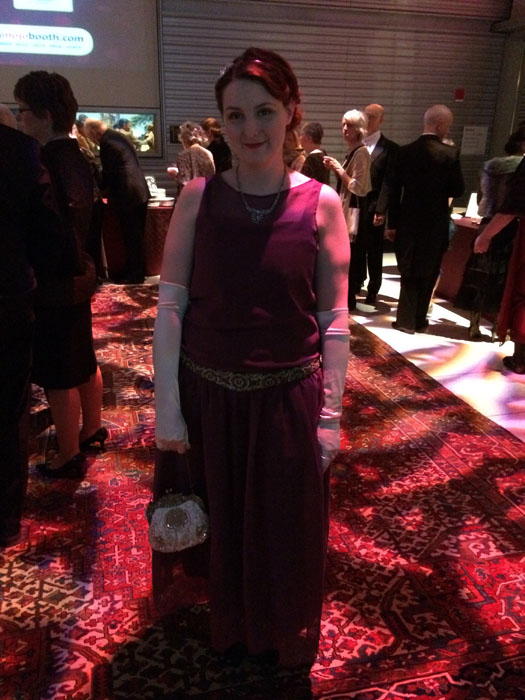
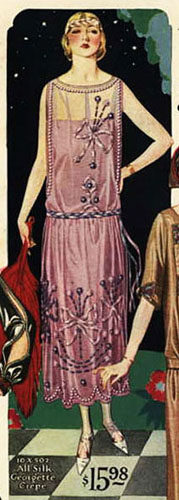
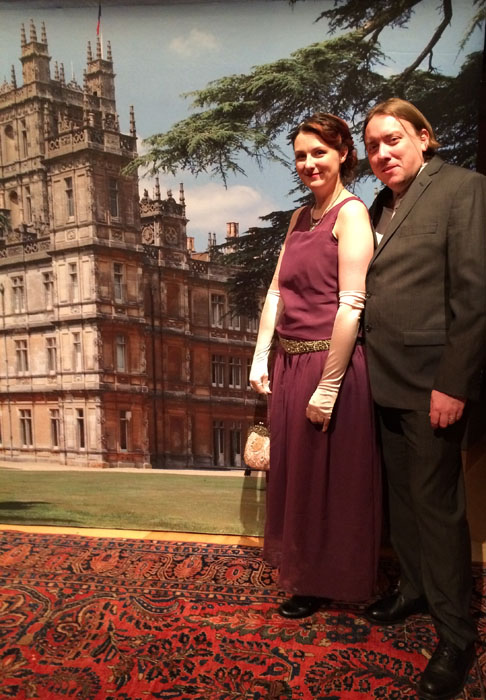
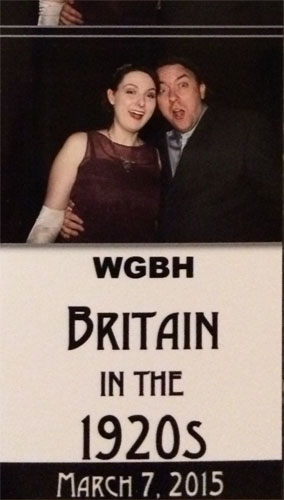
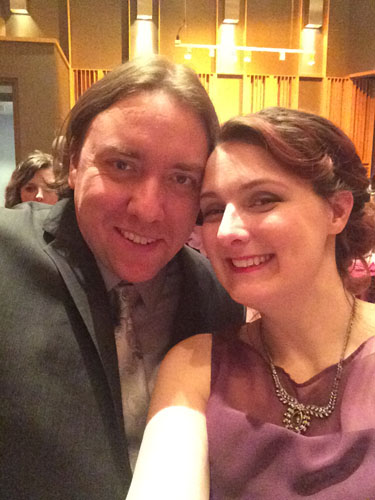
A Downton Abbey-ish Dress |
| Like most people, I was completely obsessed with Downton Abbey! However, it wasn't until WGBH announced their 1920s Downton Abbey themed event that I decided I needed to make something from this era. I decided to go with an early 1920s look, and really fell for a purple ensemble pictured in an old mail-order catalog, which has pretty ribbon/floral details. I knew I wouldn't have time for trimmings for this event, but I figured I could hoard all the supplies for trimmings and just make the base dress for the event (and that is exactly what I did!) The dress is made of plum silk chiffon and has a matching plum silk slip underneath. I'm also wearing a reproduction of a corselet/girdle type thing that I made based on an antique in my collection, which I am just now realizing that I have never photographed and shared, so will need to add that here in the near future! I accessorized with a necklace that is either one of the Downton Abbey necklaces that were available in Macy's, or a random necklace that I got at Burlington Coat Factory because I thought it looked about right - I bought both at the same time and can't remember which is which! The belt is an antique (sorry - I know I'm not supposed to wear antiques but I promise, this thing is really solid and I was very careful with it!) I even went to the trouble of locating some vintage wave clips for doing my hair, and actually did manage to get awesome 1920s waves with them, but when I went to touch them up with a brush, I ruined them. C'est la vie! So, I just pinned back as best I could, and stuck a fancy hairband on top! So, not exactly period correct from top to bottom, but I think I captured the feel, and had a great time at this event! |
|
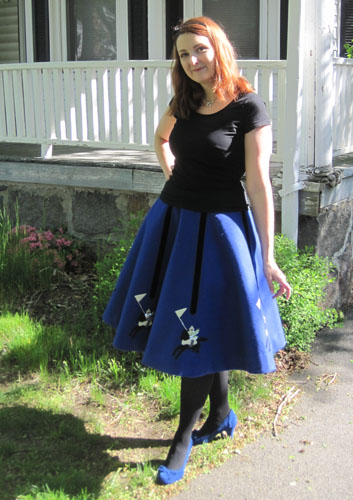
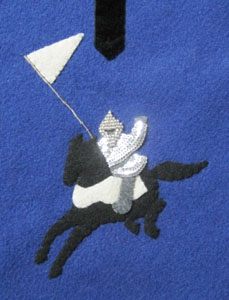
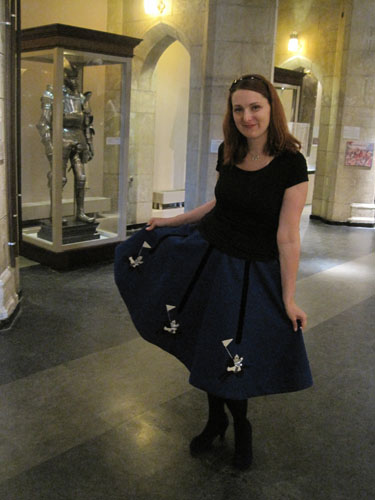
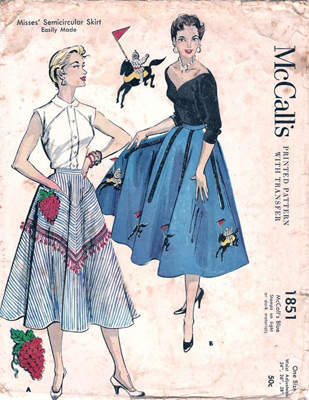
Knights in Shining Armor |
| I have a real affection for the kitschy appliquéd skirts of the 1950s, and have collected quite a few patterns with all different themes. One that is a particular favorite features knights on horseback around the bottom of the skirt. I decided that I really needed to make this one! I made my knights in felt and used tiny silver glass beads and really tiny flat silver sequins for their armor. The flag is felt with a pole made up of rocaille beads. All this trimming work was obviously done by hand and took quite a bit of time, but was a great deal of fun! My Granny even got into the project and she helped out with one of the knights, making the skirt that much more special to me! Best of all, I had the perfect event to wear it to: an event at the Higgins Armory Museum! Sadly, this museum is no more. I feel very fortunate that I got to visit it before it closed! As an added layer of fun, there was a Star Wars themed event going on that day, and as it happens, I'm married to a Storm Trooper in the 501st. So, I wore a skirt covered with knights in shining armor, to a museum filled with knights in shining armor, with my very own knight in shining armor. . . It doesn't get much better than that! |


|
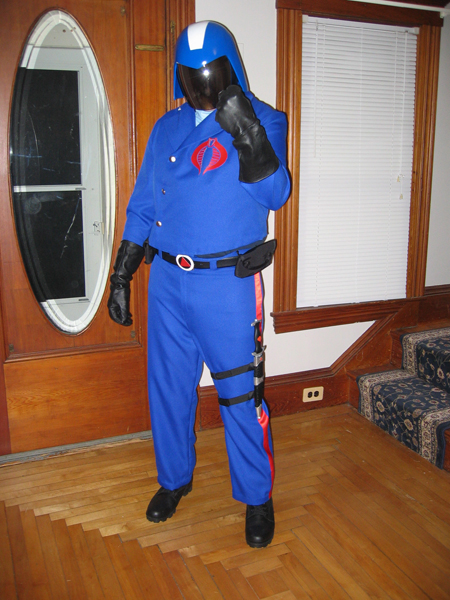
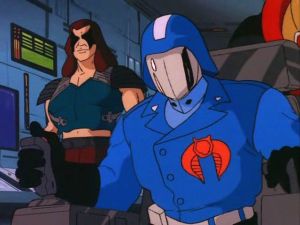
Cobra Commander |
| For our final stop on this trip through time, let's head to the 1980s. My husband is not really a fan of wearing historic costume, (Storm Trooper ensemble = cool, Mr. Darcy get-up = not cool, apparently) so I don't get to do a ton of sewing for men, but every now and then, he comes up with an idea and I get to sew for him! One Halloween, he decided he wanted to be Cobra Commander (the classic 1980s cartoon version). For the most part, I was able to use a man's suit pattern, but I did have to alter the jacket a bit to get the off-centered closure, and we also went with cropping it, because it was either that or tuck it into the pants, and I felt that the latter would have looked a little ridiulous! I'm really pleased with how this turned out, and Glenn had a lot of fun wearing it! |
|
| This project really made me want to delve into menswear, and since then, I've really fallen down the rabbit hole as far as researching menswear, hoarding supplies, and I even have a partial "Mr. Darcy" ensemble in the works. So, please stop by again some day, and hopefully see more menswear - and lots more of my usual makes as well - in the future! |